
Nellies Glen Lookout
Couple of months ago, on a Sunday afternoon, we went for a short drive up to the Blue Mountains and somehow we ended up at a location known as Nellie's Glen. The place is very close to where Explorer's Tree is found, just before you enter Medlow Bath and where one also finds the beginning of the six foot track. The day was warm but cloudy with the occasional shower and thunderstorms, just a typical summer afternoon.What inspired me in the scenery was the intermittent light coming from the broken clouds, especially the warm afternoon light.
Materials used:
- 45 x 90 cm stretched 10 oz cotton canvas
- Brushes: Flat 10 - 12 for underpainting. A selection of long flats, 4,6,8 and long filberts 2 & 4
- Oil paints (Art Spectrum, Landgridge, Norma), liquol for underpainting, Langridge Oleogel:
Titanium/zinc white, sap green, Burnt sienna, Australian red gold, Australian grey, raw and burnt umber
Blues: Ultramarine Blue, Cobalt blue, Manganese Blue
Reds: Permanent alizarin, Pilbara red, Vermilion, Indian red
Yellows: Lemon Yellow, cadmium yellow light, cadmium yellow medium, cadmium orange, yellow ochre
Blues: Ultramarine Blue, Cobalt blue, Manganese Blue
Reds: Permanent alizarin, Pilbara red, Vermilion, Indian red
Yellows: Lemon Yellow, cadmium yellow light, cadmium yellow medium, cadmium orange, yellow ochre
Under-painting (Blocking in)

First I sketched briefly the outline of the main shapes in the painting. From the photos that I had as reference I completely changed the foreground of the painting by adding two trees one on each side of the painting. Using a very diluted wash with liquol the main shapes were blocked in. Liquol (Art Spectrum) is similar to liquin and helps the paint to dry very quickly.
 |
| Blocking in the main composition |
The next step was to start establishing the form and light. As shown in the picture above initially I was going to place the light source as if it is coming from the right hand side (as seen by the highlights on the right front tree). However I changed the direction of the light later on to the middle part. Since the sky was pretty much grey and cloudy it was very difficult to see where the sun was. I also started adding some clouds using a mixture of ultramarine blue, permanent alizarin and raw umber. At this stage I use big flat brushes to quickly cover the canvas and avoid the temptation of fiddling too much. I also found that the colors I used initially for the underpainting were a little bit too light and so I darkened the overall picture, with the exception of where I wanted the highlights.

 |
| Establishing form and light |
Mid- and fore-ground
Now the real work and fun started...adding the details. I wanted this painting to have lots of details, after all I love detail. From here on wards I used smaller brushes usually very long small filberts (Art Spectrum series 1100 brushes). These brushes are excellent, they keep their shape and they are relatively soft making it easy to apply layers of colors by softly touching the canvas. I started using the gel medium from Langridge, which gives more texture to the paint while at the same time makes the paint flow easier on the canvas. The rock formations on the right hand side were painted using a painting knife and a mixture of Pilbara red, ultramarine blue, vermilion and burnt sienna.
Cliff faces of distant mountains were painted using white and Pilbara red (tinted with more white for the most distant ones). Yellow was added to highlight objects directly hit by sun while for objects lit by day light, white was added to the base color.
As in any other painting, distant objects are less defined, lighter and cooler (more blue added) when compared to the ones closer to us. Nearby objects are well defined, darker and warmer.
I also used what is known as negative painting to define better objects like the front tree on the left. Using a slightly darker version of the sky (or background) colour, I painted over parts of the foliage to open up space and define more branches.
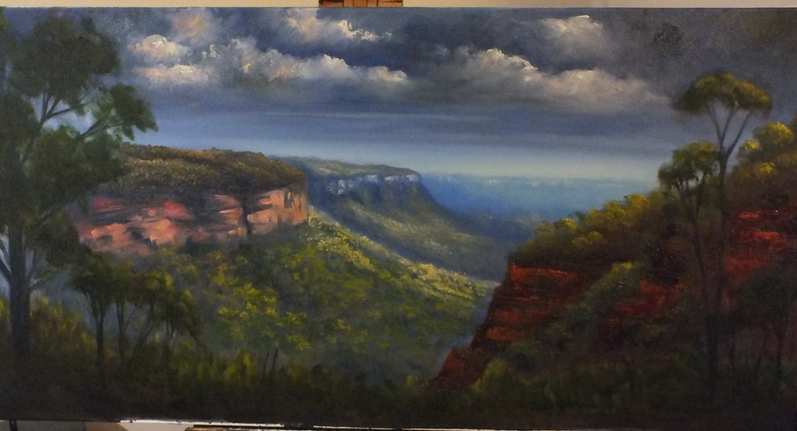
 |
| The finished painting |